Whether replacing your roof or installing one for the first time on a new build, you want to make sure it’s done right. Today we’re talking about roofing underlayment and the similarities and differences between the market’s most popular options.
What is Roofing Underlayment?
Roofing underlayment is a waterproof or water-resistant layer installed between the roof deck and the shingles (or other external roofing material) that provides added protection from weather and moisture. While some contractors may argue that once nails are driven through it, roofing underlayment is no longer waterproof, it’s undeniable that even underlayment with small nail holes is better than no underlayment. But the fact is that most underlayments are designed to actually seal around the shank of the nail after it’s driven through it, depending on the material it’s made of.
The term “underlayment” is neutral and can refer to synthetic or natural base products.
Underlayment is helpful to roofers as it provides better traction, stability, and safety when installing shingles rather than walking and working directly on slick decking. And finally, underlayment also prevents the lumber resin from the roof’s decking from damaging the shingles, and the shingles’ oils from penetrating into the porous roof deck and your home.
Roofing Felt
Roofing felt has several names which refer to the same general product. Roofing paper, tar paper, and felt or roofing felt are all terms used interchangeably and are synonyms for the same building component. They refer to “natural” underlayment, so-named for its wood cellulose base. The engineered “paper” product is then dipped into or otherwise saturated with asphalt (bitumen), giving the final product water-shedding qualities while still allowing it to breathe.
Synthetic Underlayments
Synthetic underlayment is typically made from polyethylene or polypropylene and is spun or woven to create a durable and weatherproof product. It is a common alternative to roofing felt.
You may have heard of Ice and Water Shield, or an “ice barrier” before. This is a specific type of underlayment that is a self-adhering asphalt membrane. It’s used on parts of a roof that are most susceptible to water penetration or where ice dams can form at the eaves. Although it’s usually not installed over the entire roof, this is preferred in some cases. You can read all about Ice and Water shield in this article.
Why is roofing underlayment used?
The obvious: protection against the elements
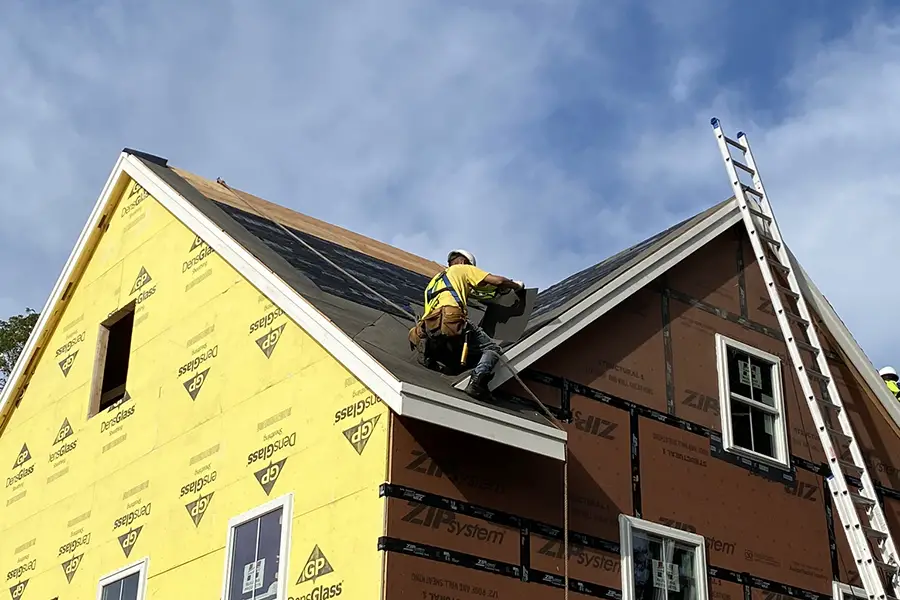
Underlayment is installed onto the roof’s decking (typically plywood or OSB) before the shingles are installed over top of it, acting as a second protective and waterproofing layer between the substrate and the finished surface. It lends additional protection to the decking and internal structure of the home in the event that the shingles are removed or damaged during a weather or fire event, during heavy or wind-driven rain events, and ice dams.
Protection against fire
Aside from wildfires now reoccurring yearly with increased intensity, fires can also be caused by everyday life: barbeques, fireworks, backyard bonfires, chimney sparks (see our article about chimney caps!), and even lightning strikes. Specific underlayments can increase a home’s fire rating, as they can slow the spread of a blaze and offer emergency services precious additional time to respond.
While roofing materials like steel or terra cotta tiles are naturally fireproof, they’re also expensive and not a reasonable choice for all homes. Shingles themselves are typically wood or asphalt, with asphalt obviously having much stronger fire resistance. Using an underlayment that slows or stops the spread of fire further protects your home- and by extension, your neighborhood.
Roofing underlayment is typically grouped into two categories for fire ratings: Class A and Class B. Class B rated materials will allow a fire to spread no more than 8 feet, and Class A rated materials will stop the spread at no more than 6 feet. It’s important to note that these ratings are not saying the material is fireproof but merely increases the fire resistance. Using underlayment with other fire-resistant or fire-proof building components also increases the class rating.
Traditional Felt – 15# vs 30# – What’s the Difference?
When talking about tar paper, the weight of the material matters more than the brand or manufacturer. The terms 15# and 30# originally referred to the weight of the material in pounds per square (referring to 100 sq. ft.) when the products were first developed. They now weigh around 8 lbs and 16 lbs for that unit, respectively. The 15# and 30# identifiers now instead indicate a guideline for the felt’s quality and best use.
The application is the main difference between 15# and 30# roofing paper other than its weight or thickness. 15# is best used on a roof that doesn’t have a steep pitch because it’s thinner and less expensive. It still does the job but doesn’t need to hold up to the added abuse of the roofer boots, which is increased on a steep roof. 30# is best for steeper roofs because it’s thicker and is thus less likely to rip or become damaged during installation. 30# is also better for slopes below 4:12 since water doesn’t shed off the roof as fast as steeper slopes and is more likely to work its way under the shingles.
In an intense storm, 30# underlayment is much less likely to tear off along with shingles because it’s thicker and stronger than the 15#. Heavier felt is a better option for areas with more intense weather in general. If your area gets extreme snowfall in the winter, frequent and intense summer thunderstorms, or you are in an area with high winds that could potentially drive water up and under the shingles, you may want to consider a heavier and thicker underlayment.
However, spending the money and time on a thicker underlayment doesn’t mean much unless the other materials were also chosen and installed with care. If the shingles or roofing decking are improperly installed, that thicker paper obviously won’t perform to its intended standards.
Synthetic Underlayment
Overall, most professionals attest that synthetic underlayment is a vastly superior product, but like anything, it has its pros and cons (though the comparison is lopsided towards the pros). While the biggest and most obvious disadvantage is cost (which can be off-putting at first), consider the cost of your other materials. If you’re spending tons of money on quality shingles/vents/soffits/flashing meant to last quite a long time, why pair that with an underlayment that won’t survive as long?
Synthetic Underlayment Benefits
- Synthetic underlayment is made from polymers, which gives it strength, longevity, and moisture resistance. When installed correctly, synthetic underlayment offers excellent weather protection and is even resistant to mold growth, which is a major advantage over traditional felt.
- When it first hit the market, synthetic underlayment was more slick than felt, and thus was considered less safe. However, as time has gone on and available products continue to improve, it’s now known to match or even exceed the traction and sureness of step as offered by felt.
- It’s extremely durable and is incredibly unlikely to tear during installation or during an extreme weather event.
- Because it lacks any organic materials, synthetic underlayment can be exposed to sun, rain, or snow without affecting its performance. Felt is known to curl quickly when exposed to moisture or intense UV rays and potentially can prevent shingles from laying flat. Synthetic underlayment, on the contrary, retains its structural integrity in such conditions. Even if it takes a few days to lay all the underlayment out on the roof before shingles are installed, the synthetic underlayment’s integrity will remain sound.
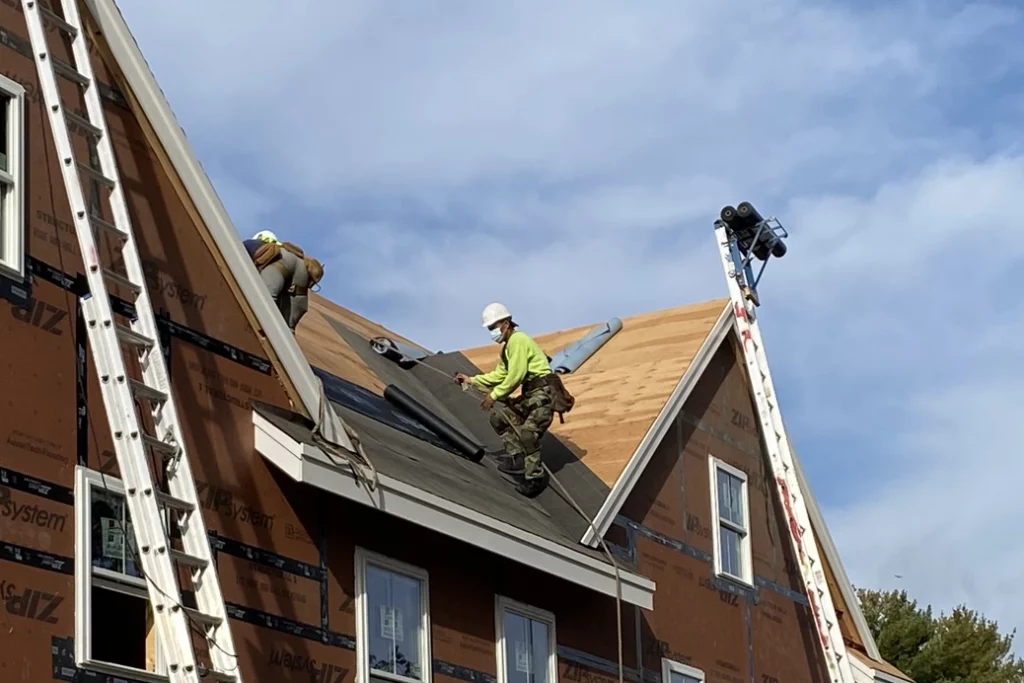
- Synthetic underlayment can be faster to install for several reasons:
- It can be up to 4x lighter for the same coverage area.
- There’s typically more coverage per roll. Synthetic underlayment is usually a 4’ wide roll covering around 1000 sq. ft. vs. a felt roll, which is generally 3’ wide and covers 400 sq. ft.
- This means fewer trips up and down ladders and in and out of trucks, as well as fewer seams and overlaps during installation.
- Synthetic underlayment often has clear markings that indicate overlap and fastener locations. This offers a much faster, as well as a more uniform installation process, and will help create a more cohesive and consistent result.
Synthetic Underlayment Disadvantages
- Manufacturers don’t use standardized materials or components, so performance can differ between brands and be less predictable. It’s best to make sure you have enough of the same brand and material for an entire project rather than finding yourself finishing up a project with a different material than what you started with.
- Because synthetic manufacturing materials aren’t standardized, it is not uncommon to discover that sometimes the labels for these products “lie,” or are knowingly inaccurate. The practice continues because few consumers take the time to measure the actual thickness of a product compared to its label or to look up a specific, unfamiliar ingredient.
- Synthetic has a lower permeability rating, so moisture does not escape as easily from the roof with this type of underlayment. Many of the manufacturers have vague language in their installation instructions about requiring a “well-vented attic” or something similar. The idea is that if water does penetrate the underlayment, it needs to “breathe” or dry. Since synthetic underlayment has a lower perm rating, it can’t dry to the outside as well and needs to dry to the inside.
- The Cost. This is the primary drawback when considering synthetic. Non-adhesive synthetic underlayment costs $.17-$.25 per square foot, while felt roof underlayment costs $.05-$.10 per square foot.
IRC Requirements
Depending on your choice of shingles, the IRC has recommendations for underlayment specific to each type of finishing material. This includes asphalt, metal, or wood shingles, clay and concrete shingles, photovoltaic shingles, wood shakes, metal panels, or slate shingles. The necessary steps for each material can be found at this link below in table R9051.1(2)
Underlayment Types – Section R905.1
The code has requirements dictating how underlayment is both applied and attached.
Generally, you will use either 1” nails or staples to fasten it to your roof deck. Make sure to check your local building code to determine what is appropriate for your environment. Most municipalities will permit staples, which are preferred as they allow for an easier and quicker installation process.
You will also want to seal all vertical and horizontal seams with an adhesive tape or membrane. It is important to make sure that the tape is deemed compatible with the underlayment product you are using by the product’s manufacturer, to ensure proper waterproofing and that the building code is met.
The Bottom Line
If you can afford it, synthetic is often preferred by roofing contractors. Ont the other hand, tar paper is time-tested and known to work. If it’s not in your budget, do your homework, make sure you’re installing the felt to all the manufacturer’s specifications, and pair it with other quality building materials. Let us know what your preference or experience is in the comments below!