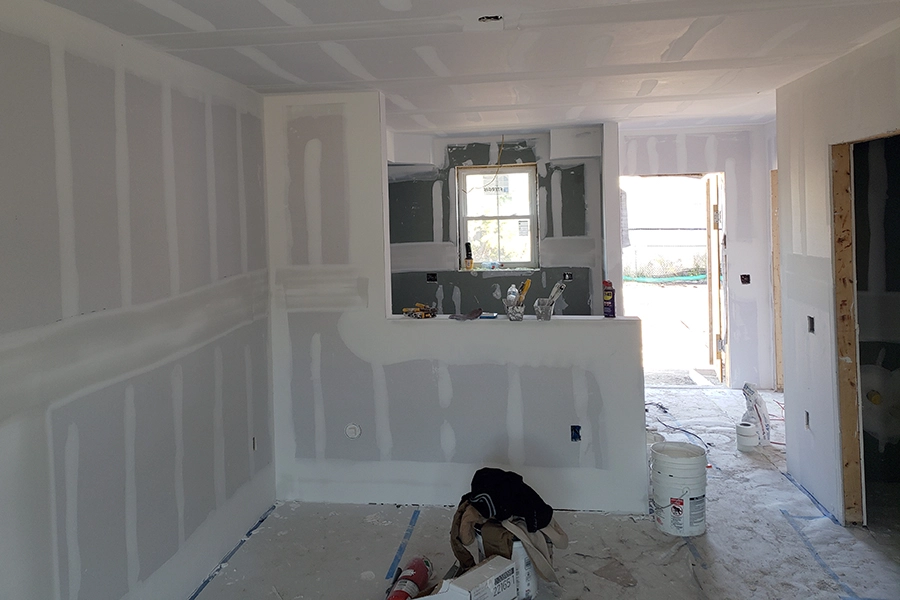
The gypsum board is hung and in place; now what? It’s now time to finish the walls. In other words, you’ll need to cover the seams between the panels and screw heads to prep the surface for painting. To do this, you’ll use a process known as taping and floating. So, get your putty knife, joint compound, and the other tools you’ll need (see below). Then, use the following steps to finish your drywall.
Steps to finish drywall
1. Get The Surface Ready
First, you’ll need to prepare the surface of the drywall. Start by using the putty knife to cover screw or nail holes with joint compound or mud. Apply an appropriate amount to the spots to fill the depression. Then, use the edge of the knife to remove excess mud, making the areas smooth. Next, cut the tape you’re using to fit the seam.
If utilizing paper tape, you will have to apply a thin layer of mud down the seam to hold it in place. However, don’t fret if that sounds like too much of a hassle because there is another solution: self-adhesive mesh tape. With it, as the name implies, it will stick to the surface of the drywall without additional help.
2. Apply A Layer Of Joint Compound
Once the tape is in place, it’ll be time to apply a layer of joint compound over it. The thickness of the layer will vary. For the most part, you’ll want it rather thin and just thick enough to cover the tape. Don’t worry. You can always spread more mud onto the area after the first layer dries if necessary. Use the edge of the putty knife to smooth and remove excess compound. The smoother, the better, but all is not lost if things are a little rough.
Of course, you will need to finish corners the same way, but you will have to buy corner bead or fold the tape so that it fits into the corners correctly. After the mud has dried, it is time to move onto the next step, sanding.
3. Smooth Rough Surfaces With Sandpaper
When wet, drywall mud is gray. Then, when the compound dries, it turns white. How long the drying process takes will vary, depending on factors such as humidity and temperature (see this article). Be sure to look at the directions on the joint compound packaging to find the optimal conditions for using the product. It may be necessary to set up a heater or fan to speed up the drying process.
Next, you’ll need a sanding block and sandpaper to run across the seams, screw holes, and other places where mud was applied. Regardless of how smooth you believe you put the joint compound on in the first place, there will be some ridges and bumps that will need to be smoothed.
4. Apply A Fill Coat, Sand, And Apply The Finish Coat
You are not all done just yet after sanding. A fill coat will need to be applied to the wall and allowed to dry. Then, it’s time to break out the sandpaper again to smooth bumps and ridges. Finally, a finish coat of joint compound will need to go onto the seams, corners, etc. After that, you’ll be ready for texturing, priming, painting, putting up trim, etc.
Tools for finishing drywall
While not every tool on this list is necessary, it’s helpful to have most of them if you’re covering any significant area. However, if you’re a DIY-er that’s only working on, say, an accent wall, it may not be necessary to gather every single item listed below. Different projects, different needs. Each image leads to a product page so you can easily purchase the tools you need.
Mud Pan or Trough
This is the container you’ll use to keep a small amount of mud in while you work. While the container itself is typically either metal or plastic, they typically all have metal edges to ensure you get clean and precise amounts of mud while working. If working with a longer knife, use a longer trough, if using a shorter knife, you don’t need such a large one.

Tape
To tie the seams of your drywall together and reinforce the joints, you’ll need to apply drywall specific tape. The tape typically comes in two types:
- Paper tape – Tends to create a stronger finished product. Needs to be applied to a layer of mud to stick. Not recommended to be used in damp areas (bathrooms, near the kitchen sink, etc.)
- Fiberglass mesh tape – Can be quicker to apply since it’s usually self-adhering. The mesh allows the joint compound to penetrate through the tape. Also great for smaller repair jobs.

Paper Tape

Fiberglass Mesh Tape
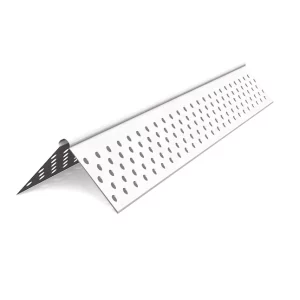
Corner and Trim Beads
Drywall “beads” are accessories that help make finishing certain conditions easier. They are typically metal, vinyl, and sometimes paper. They are typically taped and mudded over.
- Corner beads – Corner beads are most common and allow you create a sharp outside corner.
- “J” or “L” beads – These are used to clean up and cover raw edges of drywall. Some have a tear away edge that makes finishing and clean up easier.
Joint Compound aka “Mud”
Can’t do much of anything without the mud itself! There are two major groups of joint compound:
- Setting Joint Compound – These are typically mixed from a powder and are often referred to as “hot mud” because it cures (instead of dries) quickly. It is harder than drying joint compounds, making it a good first application, but can be difficult to sand.
- Drying Joint Compound – These come premixed and harden as the water evaporates from the mixture. These are typically sufficient for many DIY jobs or as a topping compound over a setting joint compound.

Lightweight, premixed joint compound is easy to use and adequate for many DIY jobs
Taping Knife aka Putty Knife
Taping knives come in many sizes: 2” Taping Knife, 6” Taping Knife, 10” Taping Knife, 12” Taping Knife… When working with joint compound, there are different types of taping knives that are better for certain techniques. While this writer loves a 6” knife and uses it for pretty much everything, many professionals like to use the different widths strategically at different levels.
For example, a 10” knife is great for spreading mud out on the 2nd coat, and a 12” knife is best for feathering the edges of mud. A 2” knife is also always great to have on hand, becomes sometimes you’ll find that you have to get some mud into an area too tight for the larger knives, and only a smaller one will work.

A simple putty knife set like this is adequate for most DIY jobs.
Corner Trowel
Exactly what it sounds like, this specialty tool is used for creating smooth and seamless corners. While it isn’t a necessary tool, many professionals swear by it and love the speed at which they can work with it.

PPE – Eye and Respiratory
Joint Compound dust is very fine and gets everywhere. Especially when working overhead, you should always wear eye protection. A dust mask is strongly recommended, as inhaling this stuff for hours can cause respiratory blockages and is simply unhealthy to inhale unchecked for hours!
If you’re using paperless drywall, be extra cautious and cover as much of your skin as possible. In lieu of paper, they contain fiberglass and can be extremely irritating to the skin.
Stools and Ladders
For ceilings, hard-to-reach spots, stairwells, and vaulted ceilings.
Sanding Sponge or Hand Sander
While the choice of which to use is up to the person, you’ll need a vehicle for smoothing out your finish either way. You can buy sanding sponges or “blocks” in bulk, and some of them have tapered edges or different sanding features on different sides, while a hand sander covers a larger area with each swipe. Either way, 120 grit is good for most sanding, but 220 is better for finish sanding.

Sanding sponges are good for small jobs but a better handle will be much more comfortable for larger jobs.
Pole Sander
For the spots that are just too hard to reach and rub by hand, pole sanders save the day.

A typical pole sander – you just need to provide a painter’s pole or extension handle.
Painters Tape
If you’re applying a skim coat around existing trim or otherwise need to have a very precise edge, painter’s tape performs the same function for mud that it does for paint.
Mixing Paddle and Drill
If mixing your mud from powder form, you’ll need this tool to achieve the right consistency. If you’re working with premixed mud in a bucket, it’s still helpful to give it a thorough mix before applying it to the wall, as air bubbles are a major pain to eliminate once the compound has already been applied.

Use with any drill
Fresh Water and a Sponge or Rag
Mud cleans up easily with water, so it’s helpful to have some on hand for cleaning your tools, equipment, or any splats that may have dropped where they shouldn’t have while you were working
Vacuum Sanding attachment
This helps pull that fine joint compound dust out of the air and directly into your vacuum while you’re working, minimizing the intensity of your eventual cleanup. Don’t forget that a good shop vac (and filters!) are needed to get good results.

Not only does this attachment vacuum, it is also an electric sander!
Tips for a Good Finish
- If using paper joint tape, it helps to dip it into water first.
- As mentioned above, keep fresh water handy. After sanding, it’s often more efficient to clean up drywall dust first with a wet sponge or mop rather than a vacuum, as the sheer volume of it can clog vacuum filters very quickly! If you are working on a site that doesn’t have running water, we recommend having a least a five-gallon bucket handy for cleaning and rehydrating mud as needed.
- A handy contractor’s trick: use a powerful LED work light pointed at an angle to your wall to check for imperfections. If they’re there, you’ll see the shadow and be able to edit those spots. A standard overhead light won’t typically work for this.
- Make sure there is no debris or dried chunks of mud in your trough- if you apply mud to the wall with a “chunk” in it, it will drag grooves through your nice smooth surface and prevent you from getting that perfect finish.
- Use your knife to scrape away ridges after your first and second coats instead of sanding- it’s faster, less dusty and messy, and requires less effort!
- Keep air moving and exhausting out of the space to dry your mud faster – mud has a lot of moisture in it, so removing the moisture from the room will dry your surface more quickly!
- Cover up floors if they’re already finished- trying to get dried mud out from between the cracks of a wood floor is no fun at all!
